
[ad_1]
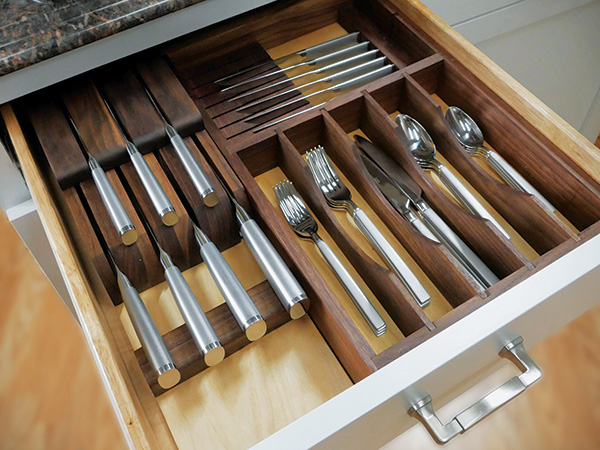
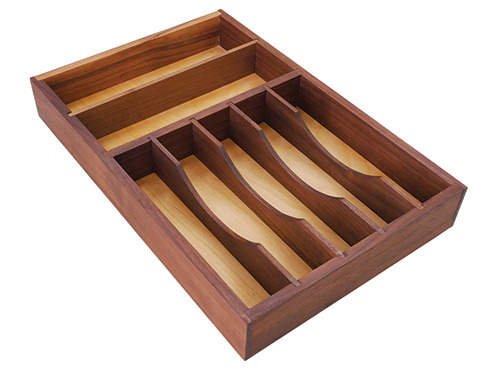
This silverware and utensil tray has sufficient areas in its important compartment to maintain your forks, knives and spoons so as. There’s additionally a rear compartment that can be utilized to retailer steak knives or as extra divided area for different bigger objects.
I made a decision to make use of my router desk to type all of the grooves, rabbets and dadoes on this venture, however you could possibly additionally do all of the machining with a desk noticed and dado blade. Be at liberty to switch the positions of the dadoes proven within the Drawings to create spacing that fits your wants finest.
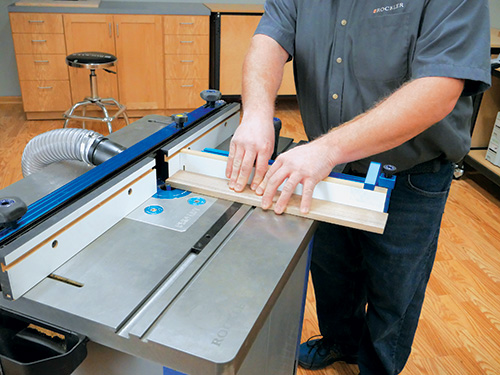
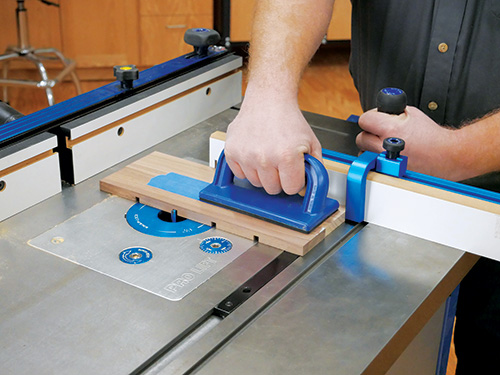
Begin building by slicing all of the components to dimension as specified within the Materials Listing. Then set up a 1/2″-diameter straight bit within the router desk. Increase the bit to 1/4″ and set the fence so the again of the bit is flush with the fence facings. Rout a 1/2″-wide x 1/4″-deep rabbet in every finish of the tray sides to seize the back and front items. Subsequent, minimize the 1/2″-wide x 1/4″-deep dadoes within the tray sides for the cross and rear dividers. Remember to keep in mind that the tray sides are mirror opposites of one another.
Milling Extra Grooves, Dadoes
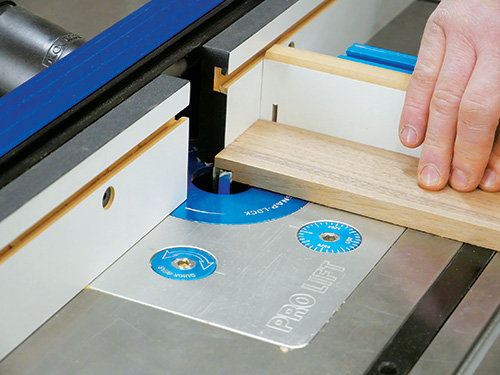
Change to a 1/4″ straight bit, set its top to 1/4″ and place the fence 1/4″ away from the again of the bit. Go forward and mill a groove for the tray’s backside panel alongside the within faces of the tray sides, back and front, alongside the complete size of those components.
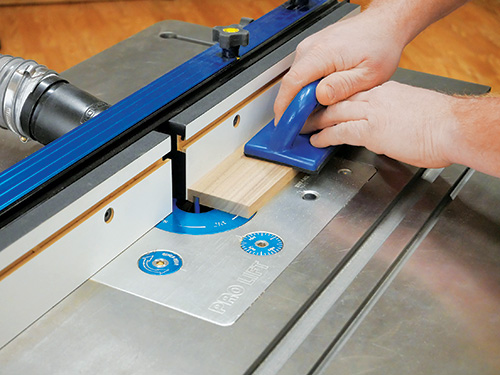
You need to use the identical bit on the identical top to rout the 4 dadoes within the tray entrance and cross divider that can maintain the silverware dividers. I discovered it useful to tape these two items along with their ends aligned so I might rout each components on the identical time. It ensures that the dadoes will line up with each other appropriately when the tray is assembled.
Now, collect the 4 silverware dividers so you possibly can draw a big radius on the highest edge of every to mark their recessed cutouts. To put these out, first draw a centerline throughout the width of every divider, and mark the middle level of those traces (it establishes the apex of the curve).
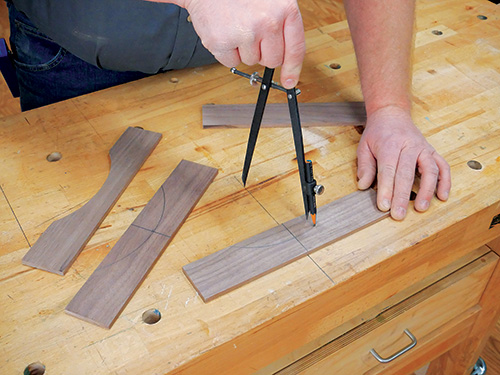
Open a compass to 4-1/2″ then arrange for drawing every curve. I simply drew a line on my workbench, aligned it with the centerline on every silverware divider, and used the bench structure line to find the purpose of my compass for drawing the radius. Minimize the recesses out at your band noticed, and sand the curves easy.
Assembling the Tray, Including Non-compulsory Elements
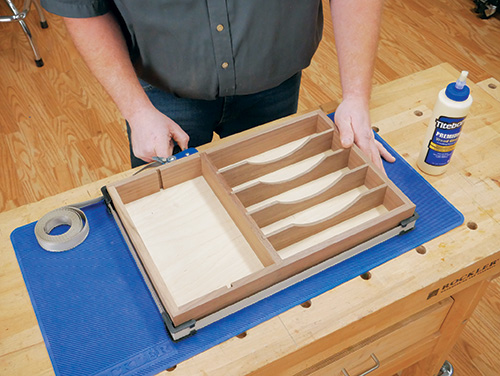
Sand all of the components you’ve made to this point as much as 180-grit. Then assemble the tray, making use of glue to the nook rabbets, backside grooves and dadoes for the cross divider. I used a band clamp to carry the components securely. Once you tighten it, watch out that the tray stays sq.; its diagonal measurements ought to match. I didn’t glue the silverware dividers or rear divider in place so these could be eliminated if my storage wants change. After the glue dried, I merely top-coated the tray with wipe-on poly to match the knife block.
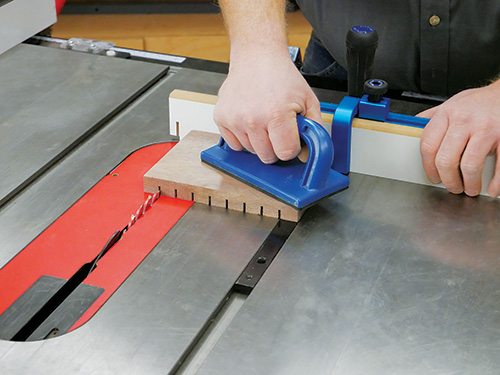
One possibility for filling the tray’s rear compartment is with a steak knife holder. Making it’s easy: I simply minimize 1/2″-deep kerfs for the knife blades throughout the face of a 3/4″ x 5″ x 6-3/4″ piece of scrap walnut. I spaced the knife-blade slots 3/4″ aside, with this spacing centered on the slots. The steak knife holder matches the tray if the rear divider is eliminated.
Not all steak knives can be lengthy sufficient to fill the world that’s left for his or her handles beside the knife block. So, I minimize a 3/4″ x 1″ x 5″ filler block and positioned that behind the ends of the handles to forestall the knives from sliding out of their blade slots.
Click on Right here to Obtain the Drawings and Supplies Listing.
[ad_2]