
[ad_1]
The ideas on this article sprang from a remark despatched in to High quality Woodworking’s Store Speak Stay podcast. “Yesterday I used to be chopping some shims on my bandsaw,” the listener wrote. “The piece I used to be chopping them from was fairly small, however I believed to myself, ‘I can get one other one out of this.’ When my finger was about an inch from the blade, the shim and the offcut bought dragged into the throat. There was a loud bang, and I jerked again. It harm rather a lot. After a second to gather myself, I opened my fist to seek out my finger intact. The ache got here from the wooden exploding and hitting it. I fell asleep final evening thanking God for the wonderful blessing of my arms.”
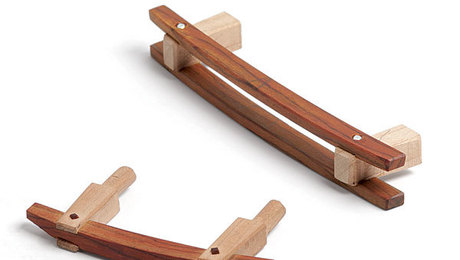
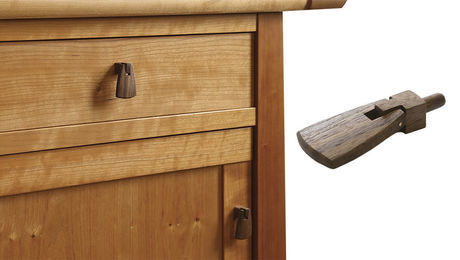
From handles and pulls to ft, wedges, wheels, drawer stops, and table-attachment tabs, woodworkers manufacture a good quantity of small elements. So much can go improper after we do.
Whereas these little elements might be tough to deal with with each hand instruments and energy instruments, hand instruments are normally safer, so all the time take into account these as a substitute for energy. That mentioned, it’s simpler to attain pace and precision with machines. And that’s the place small workpieces are their most harmful.
The excellent news is that the options are easy and easy. And, as is so typically the case in woodworking, protected methods additionally yield higher outcomes, so greatest practices are a win-win.
The primary answer: Shut the throat
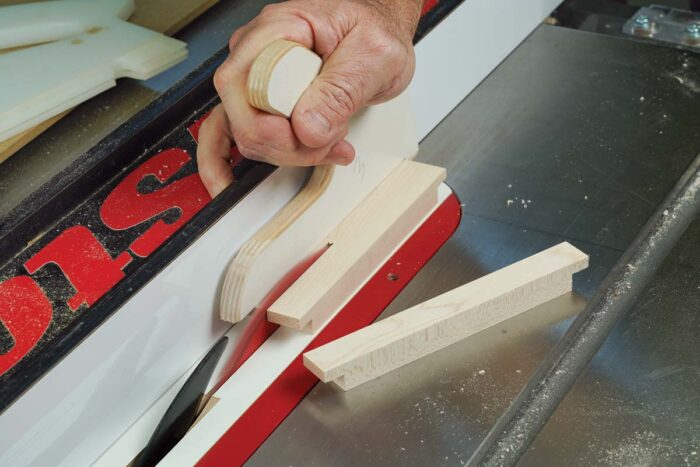
The primary pitfall in chopping small elements is the one our podcast listener fell into—a gap across the blade that enables a small workpiece or offcut to be pulled into it, damaging it and presumably pulling your fingers with it. Desk saws, miter saws, and bandsaws include massive blade slots that accommodate blades of varied thicknesses, set at varied angles. Many woodworkers discover a approach to handle this downside on their desk saws, figuring out {that a} zero-clearance throat plate will forestall chipping on the underside fringe of all kinds of cuts. However we have a tendency to not handle the problem on miter saws and bandsaws, partly as a result of zero-clearance is more durable to take care of on these machines, and since it isn’t all the time essential.
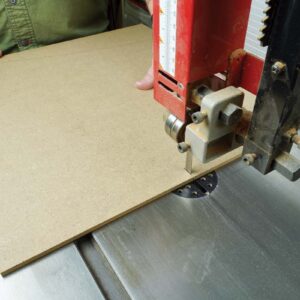
On all three machines, a panel or two of 1⁄4-in.-thick MDF is all that you must create zero clearance across the bit or blade. These tight blade gaps won’t solely guarantee clear cuts and preserve small items from diving dangerously into a spot, however they may also present you precisely the place the blade will minimize, so you possibly can align a format line with the slot, or hook a tape measure on it when organising a cease.
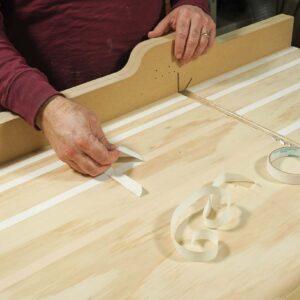
-Desk noticed sled
 |
 |
Begin together with your table-saw sled. Set the blade to the miter angle you need, and use double-stick tape to connect a big piece of 1⁄4-in. MDF. Do the identical to the fence if wanted. Then minimize by way of the MDF (proper) to create zero-clearance help across the blade.
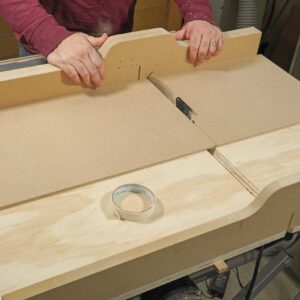
-Miter noticed
Do the identical to your miter noticed. With the noticed set to the angle you want, use double-stick tape to connect sacrificial panels of 1⁄4-in. MDF to the bottom and fence. This can allow you to minimize small elements safely. |
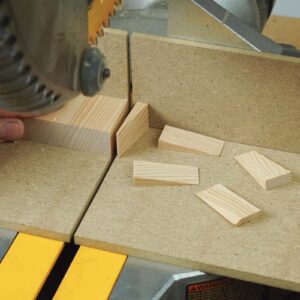
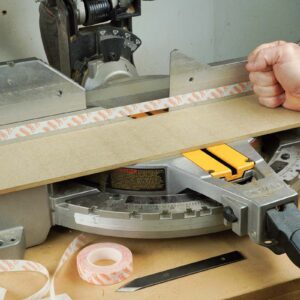
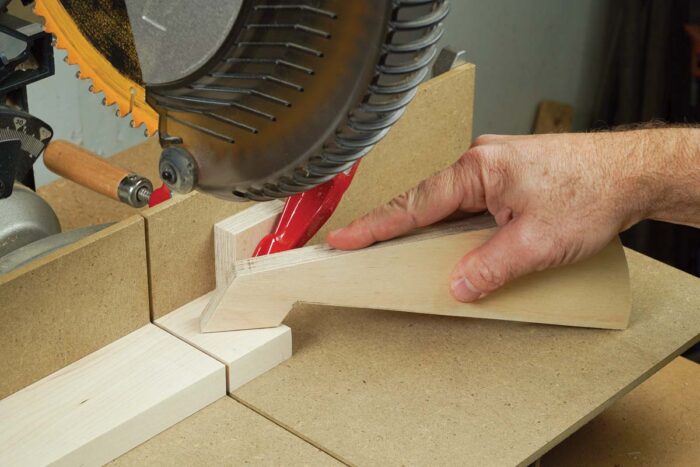
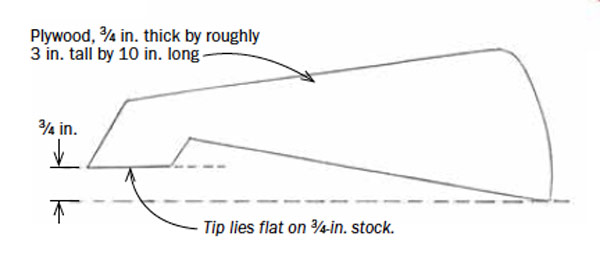
Clear, straightforward wedges. Beginning with an end-grain part minimize from a large board, you can also make good wedges on the miter noticed. Begin by angling the blade barely, after which flip the workpiece entrance to again between cuts. |
-Bandsaw
 |
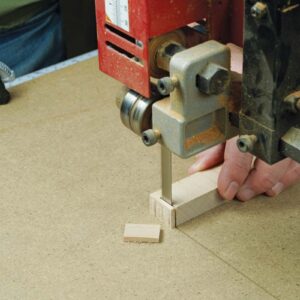 |
Zero clearance on the bandsaw. Minimize partway into a bit of 1⁄4-in. MDF, then clamp it in place to create help across the blade.
Wait to show an extended piece right into a small one
The second answer is among the common rules of protected, efficient woodworking. Contemplate the usual milling course of. The explanation we joint, airplane, and rip elements to thickness and width first—earlier than chopping them to size—is that longer items are safer and simpler to deal with on the jointer, planer, and desk noticed.
The identical goes for small workpieces. The thought right here is to do every part you possibly can to a small half (or elements)—together with milling, shaping, drilling, and so on.—whereas it’s nonetheless half of a bigger piece. This can make a world of distinction with regards to security and management, and it’s normally a extra environment friendly approach to work.
You’ll be stunned in any respect the issues you are able to do to a small workpiece earlier than chopping it free from a bigger one.
 |
 |
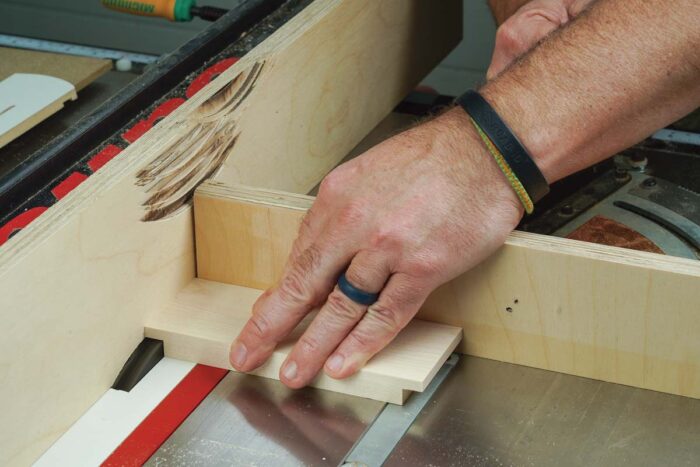
Identical precept as the conventional milling course of. Milling brief elements on a jointer or planer can vary from troublesome to unsafe. That’s why woodworkers mill elements to thickness and width (above left) earlier than chopping them to size (above proper).
 |
 |
Lengthy elements are safer than brief ones. In his Grasp Class on furnishings pulls (FWW #245), Ross Day minimize dadoes and slots in an extended workpiece, which turned a sequence of small posts (above left and proper).
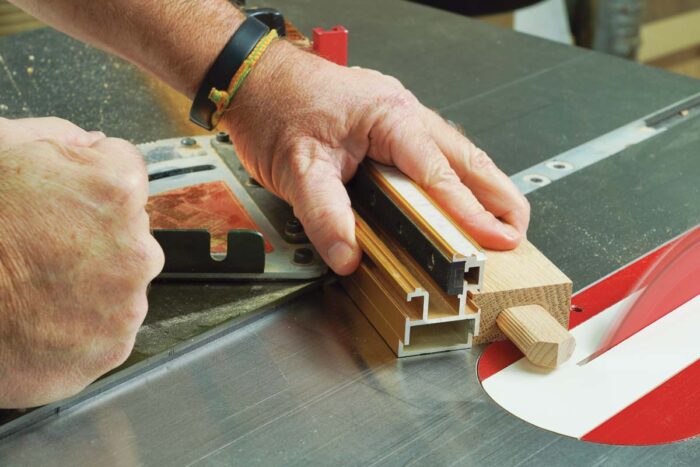
Add a provider. To chop 60° angles on the ends of Festool Domino tenons, so they might type a threeway joint, FWW contributor Phil Gruppuso inserted the tenons in an extended scrap (beneath). Small workpieces will also be glued to bigger scraps for protected chopping or shaping, then minimize off afterward.
Slicing, shaping, and drilling small workpieces safely
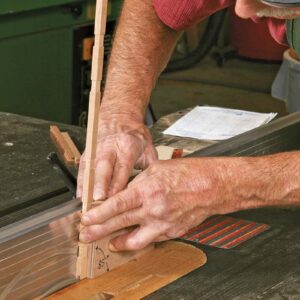
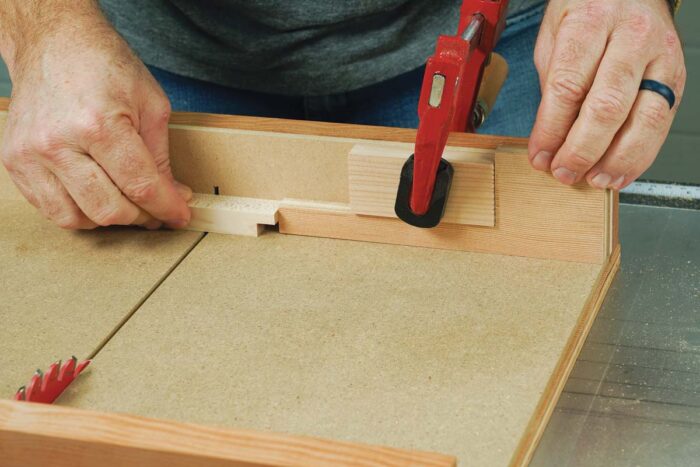
For very small workpieces, like little mitered moldings, small pins, miter keys, and so forth, my favourite cutoff device is a Japanese handsaw. However once I want much more precision, or a bunch of elements minimize to the identical actual size, I flip to the desk noticed or miter noticed, including a cease of some type. It’s crucial to manage the piece that’s trapped between the blade and the cease. There are a selection of efficient methods to manage small cutoffs, as proven within the images.
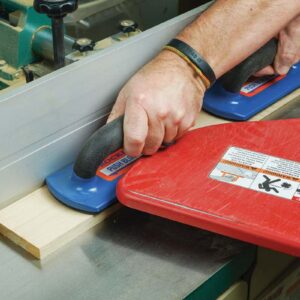
Toggle clamps are indispensable. They arrive in plenty of useful sizes and configurations, and might be connected to all kinds of jigs and sleds. |
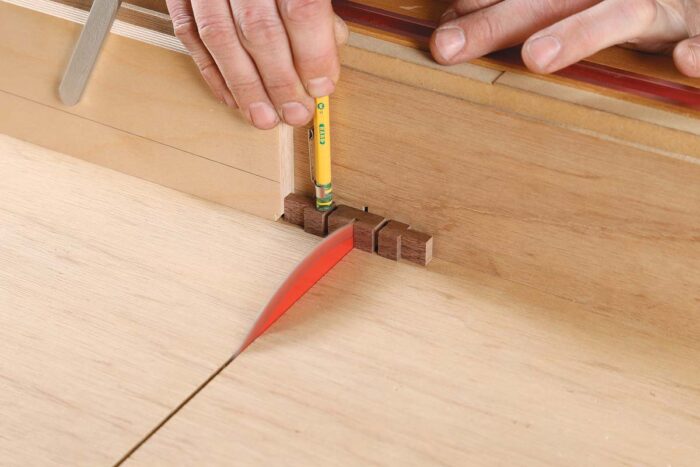
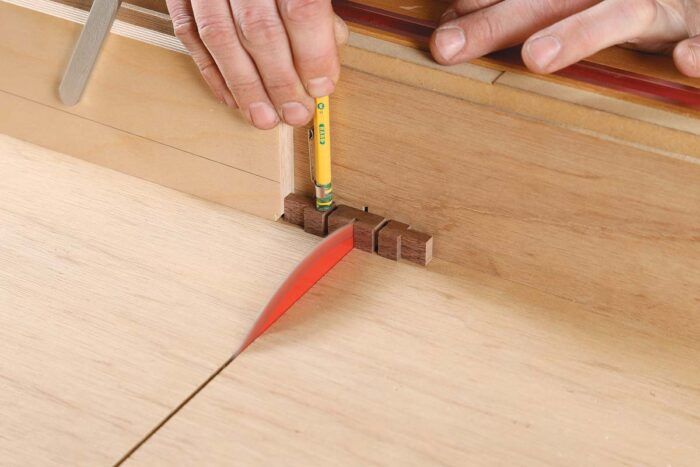
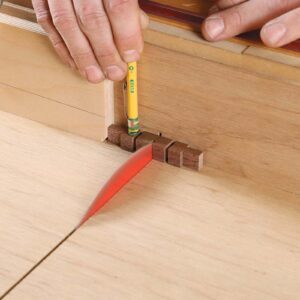
A pencil works in a pinch. In his article on pendant pulls (FWW #271), Philip Morley managed a small cutoff with the eraser-end of a pencil. |
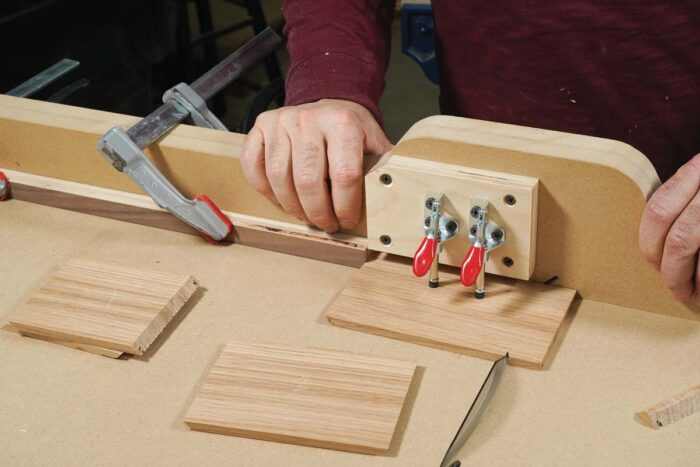
Pivoting Maintain-Down
Do this useful hold-down. This intelligent helper from FWW contributing editor Michael Fortune controls small elements safely. Not like toggle clamps, it requires no setup.
That is the final form of the hold-down. Christiana angles the tip to return down flat on 3⁄4-in. workpieces, however it’s going to maintain down thicker and thinner inventory too. |
Though there’s loads of drilling and shaping you are able to do to small elements earlier than chopping them off an extended piece, there will probably be instances you’ll have to attend till the half is small and unwieldy. Generally it’s best to carry a small half in a bench vise, permitting you to work on it with a hand device or sanding block.
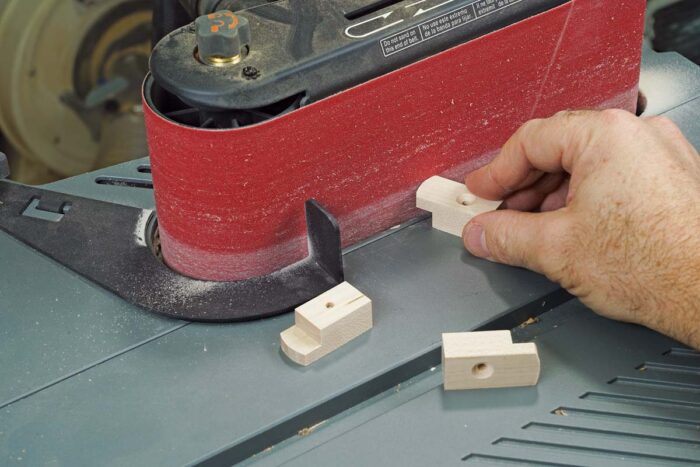
As a rule, nevertheless, to complete shaping small elements, I flip to my benchtop sanding unit, which has a belt and a drum. It’s a very good possibility for small elements as a result of the almost certainly accident is a pores and skin abrasion, which is fairly straightforward to keep away from. When sanding small elements on a disk, belt, or drum, preserve the piece on the desk in the event you can. Use a agency grip and a lightweight contact.
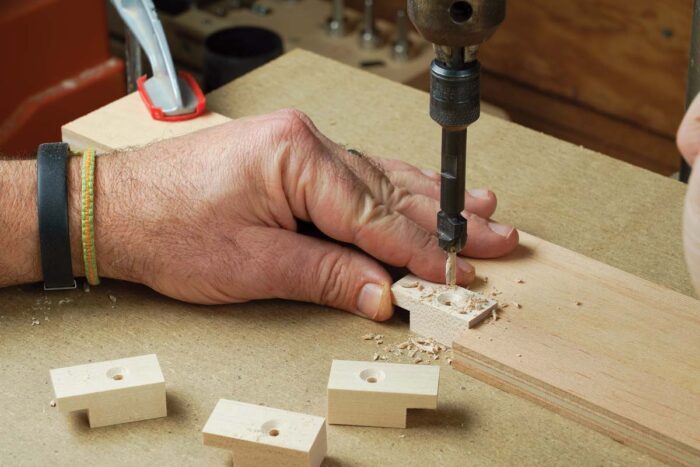
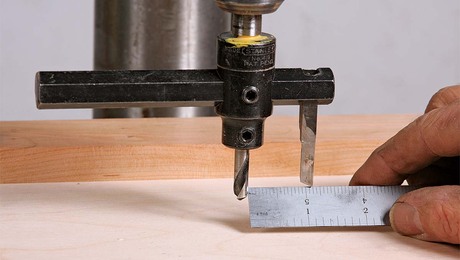
Drilling small elements is much less harmful than shaping them usually. I normally do that on the drill press. All you’ll want usually is a fence and a cease, together with your fingers holding the half in place. But when the drill bit is massive, or the half needs to drag upward in a robust manner, I safe it within the jaws of a big hand-screw clamp.
Tabletop tabs train numerous classesThese tongued blocks screw onto the underside of tabletops, becoming into slots within the desk aprons to connect the highest firmly whereas permitting it to shrink and broaden. The methods lined right here will enable you to make them safely and effectively.
Rabbet each ends of a block. Make the block lengthy sufficient to manage safely with a miter gauge. Then rabbet each of its ends utilizing a dado set buried in a sacrificial rip fence (clamped to the conventional rip fence).
Chop off the tabs. To do that safely, use a table-saw sled, with zeroclearance panels added to its base and fence, and an L-shaped cease. Bump the cease towards a clamped block to place the workpiece.
Then maintain the workpiece there, slide away the cease, and make the minimize (proper). This lets the cutoff transfer away from the blade with out hazard.
Use a fence and a cease on the drill press. To drill the countersunk screw holes, clamp a contemporary piece of 1⁄4-in. MDF on the desk, together with a easy fence and cease, and also you’ll have the ability to management these elements safely together with your fingers.
Form the recommendations on a stationary sander. A benchtop sander is nice for shaping small workpieces. When sanding finish grain, flip the workpiece to keep away from sanding towards the grain, which might trigger the piece to catch. |

There are many methods to work small elements safely. These are a number of the best and greatest I do know.
Asa Christiana is FWW’s editor-at-large.
Join eletters at the moment and get the newest methods and how-to from High quality Woodworking, plus particular provides.
Obtain FREE PDF
while you enter your e mail handle beneath.
[ad_2]